Thursday, 13 December 2018

Sending a birthday email from CDS fields using Flow

This WTF episode came about from fellow MVP Joel Lindstrom. The challenge was to have Flow send a birthday email to Contacts when the day and month of their birthday equals today's day and month. I gave it a go with CDS (Dynamics 365) and Flow.

I did hit a roadblock but I overcame it. Most of my Flows you have seen when I first launched my series was educating you around things you are familiar with today in Dynamics 365 workflows. I'm now going to step it up a notch by showing you more advanced Flows.

In this WTF episode I use a combination of actions and expressions which you haven't seen before in my previous posts. Sending a birthday email doesn't sound trivial but underneath the hood it can be because you need to think about
  • How do I retrieve today's day and month
  • How do I compare this with a Contact's birthday
  • I only want to send birthday emails to Contacts whose day and month of their birthday equals today
  • I need to schedule this on a daily basis
Buckle up cause you're about to Flow with me 🙂

Get Flowing

1. Trigger for the Flow to run daily

This logic needs to happen on a daily basis and the trigger you want to use is Recurrence. This allows you to set the parameters of how often the Flow should execute.

2. Compose action to identify the month and day of today's date

In order to identify today's date, we need to retrieve the current date. To do this we need to write an expression that will allow us to retrieve the current UTC time.  The other thing you need to remember is that date and time in Flow is treated as UTC, it will be in the format of yyyy-MM-ddThh:mm:ssZ

The expression needs to go one step further by converting the current UTC time to the local time zone and because we're only interested in the day and month, we only need to retrieve the day and month value.

For the string value of the time zone, I grabbed it from this Microsoft list. I was accidentally looking at an incorrect link but fellow MVP John Liu kindly pointed me to the right list. Thanks!

To do this we use the compose action.

The expression to use is:
convertFromUtc(utcNow(), 'AUS Eastern Standard Time','MM-dd')

3. Compose action to split the month and day

Now that we have retrieved the current day and month, we need to separate the two values as it's still in a UTC format of MM-dd. To do this we use the split function. The split function in PowerApps is the same in Flow.

The expression to use is: 
split(outputs('Convert_to_Time_Zone') ,'-')

4. Compose action to set the day value

Now that the previous action will provide outputs of month and day, we now need to set the day value in its own compose action so that we can refer to it in our criteria in a later step/action in the Flow.

The previous action provides the outputs in an array so in our expression, we need to reference the second value. 

The expression to use is:
outputs('Split_MM-dd')?[1]

5. Compose action to set the month value

The same applies in this action to set the month value.

The expression to use is:
outputs('Split_MM-dd')?[0]

6. List records to only retrieve Contacts whose birthday day and month equals today's day and month value

List records allows you to target only records that meet criteria. This is where Odata functions come into play. I decided to use the day and month function so that I can check that the birthdate (schema name) field's day and month matches my #4 and #5 compose action outputs.

The expression to use for the filter query field in the List records action is:
day(birthdate) eq '@{outputs('Set_Day')}' and month(birthdate eq '@{outputs('Set_Month')}'

7. Loop through all Contacts that meet the criteria

Use the Apply to Each to perform an action for all Contacts that meet the criteria.

8. Send email to the Contact

The action I demonstrated in my WTF vlog is the Send email (V2). The Flow team recently released an updated action that is a basic WYSIWYG editor. Enter in the email message content and you're good to go.

Spoke too soon

When your trigger your Flow, the Flow will fail. This was a true WTF moment for me as the error that spits out is:


The 'day' function isn't supported.

WHY?! 😭

Flow returns this error because of how the Odata does not support the day and most likely the month function. Even though Odata version 4.0 supports it:


Dynamics 365 does not.

I confirmed this by using fellow MVP Jason Lattimer's CRM REST builder. The message returned is:


So yeah, what now?

Get creative

In the Helper text of the filter query field in the List records Flow  action, it says it supports string and integer. I created two single line of text fields. I went with single line of text field so that I can use the Odata filter operation of "eq"


One field represents the day of the birthdate field, the other field represents the month of the birthdate field.


I then created another Flow that will trigger on create of a Contact to retrieve the month and day of the birthdate value, and populate the fields. Similar actions to my primary Flow is used which I explain my vlog.

Filter query expression take 2!

Alrighty, now we can update the filter query to use the custom fields to check that the day custom field value equals the compose action (#4) that sets the day value AND the month custom field equals the compose action (#5) that sets the month value.

The expression is:
ben_dayofbirthdate eq '@{outputs('Set_Day')}' and ben_monthofbirthdate eq '@{outputs('Set_Month')}'

Voila

Now when the Flow runs, no failures occur and the List records action successfully only retrieves Contacts whose day and month field values equal the day and month outputs from our compose actions.


YES!!!

My final comments

  • Assumption is the contact is in the same time zone that’s used in the convert UTC to local time zone action
  • I have not tried this with large volumes of data, 100,000+ records so am unsure what the performance would be like
  • Schedule recurrence at an appropriate time

Summary

You can schedule sending a birthday email through Flow. Trick is to use a couple of custom fields and the a supported Odata operator in your query. I really enjoyed going through the challenge of getting this to work.

I'm curious to know if others would have approached this differently. Like Dynamics 365/CDS, there's more than one way to achieve a desired outcome. If you find another way, give it a go with Flow and post a tweet by referencing @benitezhere so that I can check it out.

Stay tuned as I have another cool post coming up.

Help me get to 500 YouTube subscribers

As mentioned in my vlog, subscribe to my YouTube channel if you haven't already done so as Will from TDG will supporting my milestone achievement by doing a sheperd's pie vlog. This was mentioned in the Power Apps podcast episode where I was a guest and chatted to ShawnChris and Will. It would be great to see in Will in the kitchen 😄

Jokes aside, it would be great if I reach 500+ subscribers. I started in 2014 and I'm going to keep going till I can. Thank you!

Wednesday, 28 November 2018

How to display a date field value correctly in an email in Flow


In my previous blog post and vlog I covered how to reference related entity data. The last use case was to send an email to the contact associated to the Case where the Created On value is included in the email message content. Currently today we're used to configuring this through the Form Assistant by selecting the Created On field of the Case.


If you do this in Flow using the Get Record action and Send email from Shared Outlook Mailbox, it'll look like the following.


Yes, a true WTF moment. Welcome to another WTF blog post.

Why does it display in this manner?

I stumbled across this when I was in the process of converting my Dynamics 365 workflows into Flow for the Dynamics 365 Saturday NZ conference earlier this year. I knew I needed to use the Get Record action and when I did it was showing up as seen in my screenshot above.

That's when I came across Stephen's blog post in the Flow community site. If you don't know about the Flow community site, you should definitely check it out. There's lots of useful nuggets in there.

Anyways Stephen's blog post explains that Flow treats Date and Time in UTC and talks about using a particular action. The other thing to take note of is that Dynamics 365 also stores Date and Time as UTC. When we see the date and time in the user interface it will be shown in the timezone of the user if it's defined as User Local. For further information on the other Date and Time definitions, refer to this docs.microsoft.com article.

Using the convert time zone action in Flow

This action is pretty simple to understand.

  1. Base time - this is where you need to reference the Dynamics 365/CDS field. In my scenario it's the Created On field of the Case
  2. Format string - this is where you can define the format of the date and time. You can either choose from a list or make your own
  3. Source time zone - this is where you set the value to UTC
  4. Destination time zone - this where you set the value to the local time zone
Once you have this Flow action set up, you're good to go. In your email message you can now reference the convert time zone action. 


When the recipient of the email views the email message they will now see the the date displaying correctly in a more end user friendly manner.

Is there any value in this "extra" configuration step?

OK you might be outraged that you need to go one step further in Flow to get the date and time displaying correctly in an email message compared to the minimal configuration required in Dynamics 365 workflows

However the advantage I see is that you now have the power to format the date the way you want it to. Those who are familiar with Dynamics 365 will know that
  • if you want to have different formatting in Email Templates or in an Email activity created from a Dynamics 365 workflow, you have to turn to some type of custom method
  • you can change the formatting of date and time in Settings so that it shows as desired but this applies globally in Dynamics 365, it's a system wide setting
Here are a few posts that demonstrate people asking about how to change the format of date and time outputs
If you turn to the developer guide on docs.microsoft.com, you'll see a bunch of information on how to to convert date and time fields through code.

By using the convert time zone action in Flow you have the power to choose what format you want as the output in your email message without any code.

Summary

Use the convert time zone action in Flow to display a date and time field value in an email message. If you don't, it will display as UTC in the email message.

If this has helped you, tweet to let me know. Thank you.

This Flow is available in the TDG PowerApps Bank.

Happy Flowing!

#WTF #FlowFever #TDG

Thursday, 15 November 2018

How to reference related entity data in Flow

What we're currently used to in Dynamics 365 workflows is using the Form Assistant to reference data to a N:1 entity. This is usually when we want to grab field data from a lookup field on the entity form.

In Flow we don't have a Form Assistant to guide us but there is the Get Record action in Flow. It's somewhat different but it's easy to understand. Welcome to another WTF blog post where I explain the Get Record action and what happens if you don't use it.

Use case 1 - reference Company Name

In my first example seen in my vlog, I reference the Company Name from the selected Account in the Customer lookup field of the Case record.


If you don't use the Get Record action and reference the Customer Dynamic Content either in your Dynamics 365 or CDS connector, it'll look like this in your model-driven app.


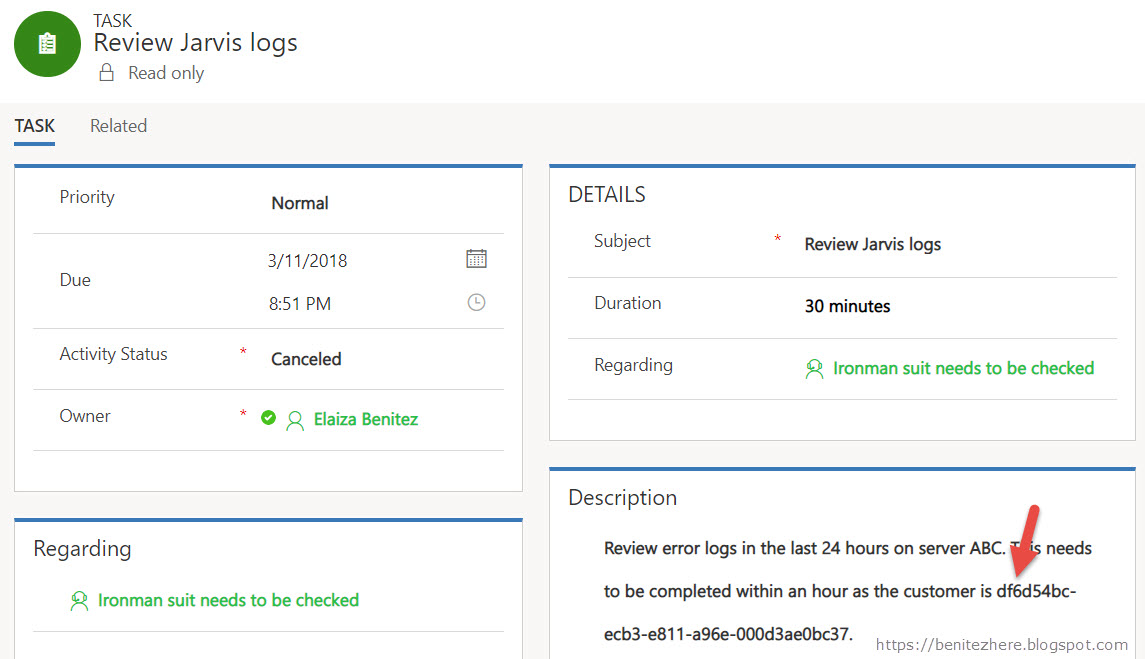
You'll see the GUID rather than the Company Name. As explained in WTF Episode 1, Flow uses the ODATA APIs of Dynamics 365. It sees the referenced Customer as a GUID.

When you use the Get Record action, you'll be able to reference the Company Name.
The breakdown is as follows:
  • Entity - represents the related entity you want to reference
  • Identifier - represents how you are identifying the record. In this use case we are performing it through the Customer lookup field in the Case entity which is my CDS trigger of my Flow

Once you have inserted your Get Record action you can then correctly reference the Company Name through the Get Record action. When your Flow executes, this time it will correctly display the expected Company Name value.

Use case 2 - Reference email address

This is a common use case when we want to send an email using Dynamics 365 workflows. As seen in my vlog, I'm sending an email to the Contact through the lookup field in the Case. What we are used to when configuring in Dynamics 365 workflow is selecting the Contact in the Form Assistant.


If we do this in Flow, this is what happens.


An error is thrown because Flow again sees it as a GUID instead of an email address.

By using the Get Record action you will be able to reference the email address of the Contact based on the Contact value in the lookup field in the Case record.

Summary

The Get Record action is basically the Form Assistant that you're used to when you want to reference related entity data in Flow. This will allow you to reference fields from N:1 entities.

The next roadblock you might experience is when you reference data and time values in your email message step in Flow, it'll look like this:


In the next WTF blog post I will show you how to get around this.

Stay tuned citizen!

Wednesday, 7 November 2018

Embedding Power BI report and dashboards in Dynamics 365 for Portals

All you die hard fans of displaying beautiful data through the art of Power BI can now rejoice as it's never been more easier to embed Power BI visualizations into Dynamics 365 for Portals. This is another new October 2018 release feature. Get excited cause it's super easy to configure.

What you need

  1. Dynamics 365
  2. Dynamics 365 for Portals
  3. Power BI

How to enable Power BI Integration

Enable Power BI integration through Portal Details. Head over to the Dynamics 365 Admin Centre and in the Application tab, select your Portals instance to open up Portal Details.

In here you'll see a new option called "Set Up Power BI Integration." 


Click on this and Power BI integration will be enabled. Super easy.

Understanding what can be surfaced

You have three options to choose from
  1. Power BI Report
  2. Power BI Dashboard
  3. Power BI Dashboard tile
In my vlog I demonstrated the first two. 

Method to use for embedding Power BI visualizations

You'll need to use Liquid tags with a couple of parameters which can be done through a web page or a web template. These parameters are 
  • Authentication type
  • Path

Authentication type

If using a secure Power BI report or dashboard where only Azure Active Directory authenticated users can view the Power BI, you need to use the tag of "AAD" Make sure the report or dashboard is shared to the required users.

If you want to use a Power BI report or dashboard that will be visible to anyone, you'll need to publish it to the web and use the tag of "anonymous." If you don't know how to do this, check out this article.

For more details on liquid tags for Power BI, refer to this https://docs.microsoft.com article.

Path

This is the URL of your report or dashboard.

Combining the two parameters

As referenced in the docs.microsoft.com article, your tag would be something like the following
{% powerbi authentication_type:"AAD" path:"https://app.powerbi.com/groups/00000000-0000-0000-0000-000000000000/reports/00000000-0000-0000-0000-000000000001/ReportSectionc01" %}

OK, ready to apply tag

You can either insert your Power BI liquid tag in a web page or web template. In my vlog I used a web page that I had created.

Insert the tag in the Copy field of the Localized Content record and you're good to go. Super easy.

Power BI visualization in action

Once the web page is saved, browse to your Portals instance and view the web page. Ta da! Awesome sauce.


What I do like about using a Power BI report is that users can interact with the report still. As mentioned in my vlog I was expecting it to be static and not interactive. Bonus in my opinion that you can interact the report as how you normally would.

Summary

The configuration steps are pretty simple and it doesn't take that long to hit the ground running with embedding Power BI visualizations in Dynamics 365 for Portals. I thought this was pretty cool when I had play with it last month.

I am not a Power BI guru but the person I recommend you check out and follow is none other than MVP CRM Chart Guy,
Cool, have fun configuring!

Thursday, 1 November 2018

SharePoint Document Management for Dynamics 365 for Portals

I'm excited to share with you that SharePoint Document Management is back for Dynamics 365 for Portals. Over two years ago, Donna Edwards, requested that this feature was to be brought back. Short history lesson - back in Adxstudio Portals you could configure SharePoint Document Management. When it was acquired by Microsoft and was included as part of Dynamics 365 Customer Engagement enterprise subscription, the feature was no longer supported.

It has been the most requested feature and the product team have listened. As a MVP I was invited to review and provide feedback to the new October Release 2018 features for Dynamics 365 for Portals. I demonstrated the three new features in the October Melbourne User Group.
  1. SharePoint Document Management
  2. Embedding PowerBI 
  3. New modern Portal editor


In this blog post I will go through the configuration steps required to enable SharePoint Document Management.

Entity I am using

I used the Case entity for enabling SharePoint Document management. This was shown in my vlog and will be used for screenshots in this blog post.

Step 1

Enable the document management for the Case entity in the entity configuration record either by opening up solutions from within Dynamics 365 or PowerApps (through https://web.powerapps.com).


Step 2

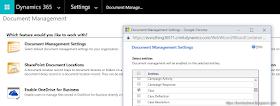
Enable entity in Document Management Settings. There will be a wizard you follow.


Step 3

Enable SharePoint Integration through Portal Details. Head over to the Dynamics 365 Admin Centre and in the Application tab, select your Portals instance to open up Portal Details.

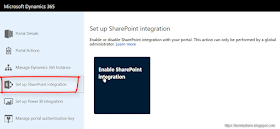
In here you'll see a new option called "Set Up SharePoint Integration." 


Click on this and you'll see an Enable SharePoint Integration option.


You'll be prompted to select your user account to enable required permissions.


Accept the required permissions presented.


Step 4

Configure the entity form to display a sub-grid of Document Locations in the Case entity configuration record either by opening up solutions from within Dynamics 365 or PowerApps (through https://web.powerapps.com).

  1. Make sure you configure the correct entity form that your Dynamics 365 for Portals references.
  2. Make sure you select Active Document Locations as the view as by default My Active Document Locations will be selected.

Step 5

The final step is to create a Child Entity Permission record. The Dynamics 365 for Portals entity form will need to have the "Enable entity permissions" checkbox enabled so that the Portals user can upload files though the sub-grid

There will be a Parent Entity Permission that will drive access to the Case entity. In my scenario, it is an entity permission that allows contacts to create, view, edit and delete Cases if they are the customer in the Customer field of the Case. Against this entity permission, I create a child entity permission.


SharePoint Document Management in action

After the above steps, you're now able to see it in action. 

Sign into your Portals instance and create a new case. After the case is created, you'll now be able to upload files. Remember, Dynamics 365 for Portals respects Dynamics 365 functionality so you cannot interact with a sub-grid until the records is created and saved.

By the sub-grid you'll see two buttons, 
  1. Add files which will allow you to upload files
  2. New folder which will allow you to create a new folder to upload files into
Awesome sauce, you're all set to upload files now 🙂


Once uploaded you can also browse to the SharePoint document location from the Case record.


As demonstrated in my vlog, files portals users delete if they have the permission to do so, will also be deleted in Dynamics 365 and in SharePoint online.

Summary

The most requested feature for Dynamics 365 for Portals returns and is all configurable. I am not a SharePoint configuration expert in the context of Dynamics 365 so if you have questions, it's better suited for the Dynamics Community forum. Please also refer to https://docs.microsoft.com for more information on managing SharePoint documents.

Stay tuned for my next blog post on Dynamics 365 for Portals October Release 2018.

Shout out to the Dynamics 365 for Portals product team for inviting me to play with these features in advance 😁 #thankyou

Thursday, 25 October 2018

Referencing a Two Option field in a Flow condition step

In my previous blog post, I share how you can reference an Option Set field in a Flow condition step. This time round I'm showing you how to configure a Two Option field in a Flow condition step.

In Dynamics 365 workflows we can reference a Two Option field in a workflow step.


As defined in the https://docs.microsoft.com site:

This field provides two options. Each option has a number value of 0 or 1 corresponding to a false or true value. Each option also has a label so that true or false values can be represented as “Yes” and “No”, “Hot” and “Cold”, “On” and “Off” or any pair of labels you want to display.

How many ways can you go wrong with this in Flow? You'd be surprised. A true #WTF moment.
I experienced the frustration and wanted to share this in case someone else is going through this same pain.

Welcome to another WTF blog post where I share with you how to replicate this in Flow.

What did not work and what worked

Here's a table summary of the different values I tried in my expression.

Summary

For the Two Option value of 0, use false.
For the Two Option value of 1, use true.

Both are applicable to Dynamics 365 connector or CDS connector.

Tweet if you came across this post so that I know I helped you out 😁

I think this is my shortest blog post ever.

Till next time, toodles.

Thursday, 18 October 2018

Referencing an Option Set in a Flow condition step

A field type that can be referenced in a Dynamics 365 workflow condition step is an Option Set. As defined in the https://docs.microsoft.com site:
This field provides a set of options. Each option has a number value and label. When added to a form, this field displays a control for users to select only one option.
In Dynamics 365 workflows we are used to configuring a condition step in a clicking manner when referencing an Option Set.

How do I replicate this in Flow?

Welcome to another WTF blog post where I share with you how to replicate this in Flow.

Two Dynamic Contents to choose from

When referencing an Option Set in Flow through a Dynamics 365 connector, there will be two options (no pun intended) presented to you. 


1. This will reference the number values of the options in the Option Set
2. This will reference the the labels of the options in the Option Set

Using Dynamic Content No.2

This is displayed as <field name> Label in the Dynamics Content selector. In my scenario, I see Priority and Priority Label.

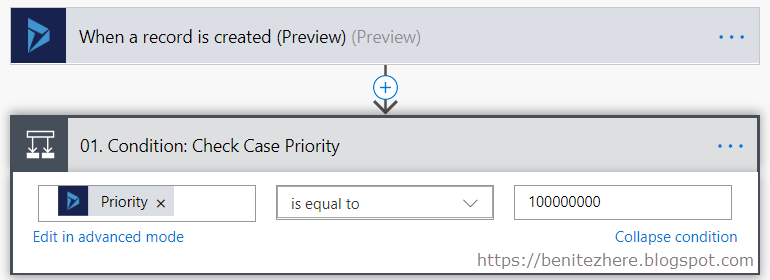
Selecting Priority Label is a valid approach as it allows you to configure the Flow condition step by entering the label of  an option such as "VIP" in the criteria of the expression.

Why this is useful

If the person configuring the Flow is not familiar with customizing Dynamics 365 they will only know of the options displayed in the Option Set field through their regular interactions with the field on a daily basis. You simply navigate to the field, then click on the Option Set field to see the options that can be selected. 

Why this is not useful

Using the Priority Label will not safeguard the Flow from future changes to the label of the option. As seen in my vlog, if I were to change VIP to Very Important, the Flow will not pass the expression of the Flow condition step the next time it is executed. This is due to the Flow condition step being told in the expression that the Priority Label criteria must be VIP, not Very Important.

Using Dynamic Content No.1

Priority is another valid approach in the Flow condition step when the trigger is a Dynamics 365 connector. Rather than using the label of the option the number value will be used instead.

When using the number value in Flow, the commas need to be removed. If you leave the commas of the number value after copying from the field configuration record in Dynamics 365 and pasting into Flow the expression will fail. So remove the commas!

NOTE: If using CDS connector you will only be able to use Priority in your expression. 

Why this is useful

If in the future the label value changes, such as from VIP to Very Important, the Flow condition step will continue to pass the expression because the number value is used, rather than the label.

Why this is not useful

The person configuring the Flow is required to know the number values of the options in the Option Set fields. The person may not know or have the required access to view the option set number values. However one could argue that only certain users in Dynamics 365 or CDS would only ever be allowed to configure workflows in the first place, therefore would have a security role that would provide them with the ability to do so.

Summary

If you are restricted to using the Dynamics 365 connectors because you don't have a Flow Plan 1 or Plan 2 to use CDS connectors, recommend to use the Dynamic Content that will reference the number values of the options in the Option Set instead of the Dynamic Content that will reference the labels in a Flow condition step. This way if the label is changed in the future, the Flow condition step will continue to execute as the number values are being referenced.

If you use a CDS connector as a trigger for the Flow, then you can only use the Dynamic Content that will reference the number values of the options in the Option Set.

Whether it is Dynamics 365 connector or a CDS connector, you will need to know the number values of the Option Set for your Flow condition step. This requires access to viewing the Field configuration record in Dynamics 365 or in CDS.

Thursday, 11 October 2018

Triggering a Flow when Dynamics 365 fields have changed

When you configure a Dynamics 365 workflow to be triggered on update of a record, it is defined by fields that have changed.

How do I replicate this in Flow?

Welcome to another WTF blog post where I share with you on how to replicate this in Flow.

Can I do this using a Dynamics 365 trigger?

The answer is no. Not what you wanted to hear right?

When you use the Dynamics 365 trigger of "When a record is updated" or "When a record is created or Updated" the Flow will always execute because you are unable to define the fields that the Flow needs to validate as a result of an update in Dynamics 365. There's two reasons why this is not ideal.

Reason one

If you have other Flows that are executing for the same entity where you have selected the "When a record is updated" trigger, all your other Flows will execute. If there is a Flow that is updating a field whenever an update has occurred for the record, you'll experience the Flows to continuously execute.

I experienced this when I was experimenting with what I could do with Flow in the beginning for my Dynamics 365 Saturday New Zealand presentation. I had a few Flows executing for the same entity whenever the record is updated and one of them ended up being continuously triggered.

Reason two

If you have a large volume of Flows that will execute in a month and you are on the free plan of Flow, i'ts possible that you may reach that limit. You don't want to burn through your threshold.

Oh dear. What can I do then in Flow?

If you have a Flow Plan 1 or Flow Plan 2, you are entitled to use Premium connectors. A Premium connector that is available to use is the Common Data Services connectors. I showed you this in WTF Episode 1.

When you select the "When a record is updated" CDS trigger, you'll see Show advanced options. When you click on this, the step will expand where you can select your field(s) to define when the Flow is executed.

Does it work?

Yes as seen in my vlog. If you update any other field that is not defined in the trigger step of Flow, the Flow will not execute. The moment you do update a field that is defined in the trigger step of the Flow, the Flow will execute. This means the number of Flows executed whenever a record is updated will be low in comparison to when a Dynamics 365 trigger is used.

Summary

If you want to replicate the same functionality that you are used to in Dynamics 365 workflows where it will only start when fields have been updated, you must have a Flow Plan 1 or Flow Plan 2 licence to use the CDS connector. In the "When a record is updated" CDS trigger, you can define the fields through advanced options.

If you don't have a Flow Plan 1 or Flow Plan 2, you will need to create some additional fields to prevent other Flows that reference the same entity to continue to execute. However the Flow will still execute whenever an update has been made to the record.

Another #FlowFever blogger to follow

Thanura, aka T or Thunder ⚡ has a blog post that provides a side by side comparison of Dynamics 365 connectors and CDS connectors. I recommend you check it out as it's a great blog post that will help you understand the limitations.

T blogs about Flow in the context of Dynamics 365 in our community, follow him.

Till next time, toodles!

Wednesday, 3 October 2018

Does not contain data and Does contain data in Flow

Another type of configuration that we are familiar with in Dynamics 365 workflows is Does not contain data and Contains data in a condition step. This is typically used to check whether a field is populated with data for the next workflow steps to take place.

When you use basic mode, you'll be presented with the click and select style you're familiar with in Dynamics 365 workflows however what is missing is Does not contain data and Does contain data.


It is not as obvious on how to achieve this in Flow compared to Dynamics 365 as the two are visible in Dynamics 365 workflows. 


Welcome to another WTF post on replicating Dynamics 365 workflow functionality in Flow!

Replicating Does not contain data

In Flow we have to edit in Advanced mode instead of using basic mode. I covered Advanced mode for AND OR statements in my previous blog so check it it out if you haven't already done so.

When you select the field you're after in basic mode, switch to advanced mode. Your expression will look something like this:


The expression to use for Does not contain data is

@empty(triggerBody()?['_productid_value'])
  • You replace the condition expression with empty 
  • Remove the comma 
  • Remove the field reference of  ' '
The step will now pass the function with the logic of checking that the field does not contain data, in other words is NULL.

Replicating Does contain data

To achieve the same for Does contain data, use an additional condition of not( ).

@not(empty(triggerBody()?['_productid_value']))

This will now pass the function with the logic of checking that the field does contain data, in other words is not NULL.

Summary

Use edit in Advanced mode to achieve Does not contain data or Does contain data in Flow. You'll need to enter the expression as outlined in this post within the Condition step in Flow.

Happy Flow'ing 🙂 #wtf #FlowFever

Wednesday, 26 September 2018

AND OR statements in Flow

When using a Check Condition step in Dynamics 365 workflows, you have the ability to to the following
  • AND
  • OR
  • Group a combination of AND OR

In this #WTF post I will cover how to do this in Flow as the configuration is different. Remember, Flow uses the odata APIs of Dynamics 365 which results in different configuration. However our Dynamics 365 knowledge still applies 😁

Two types of modes

When using a condition step in Flow there's two modes that you can apply. 
  1. Edit in Basic mode
  2. Edit in Advanced mode

Basic mode

This is the familiar "click and select" concept where you choose your condition and the field value.

Advanced mode

This is where you can make additional adjustments that is not available through basic mode. This is what we will use for AND OR statements. Why? In basic mode you cannot set more than one condition in a Flow condition step.

Breaking down Advanced mode

OK, this is where I give you my explanation. Disclaimer: I am not a developer and the terms I use is what makes sense to me. It is not the official explanation but this is how I have understood it which has helped my learning and adoption of Flow.

In a Flow condition step, it is calling a function to pass single or multiple parameters using some logic.

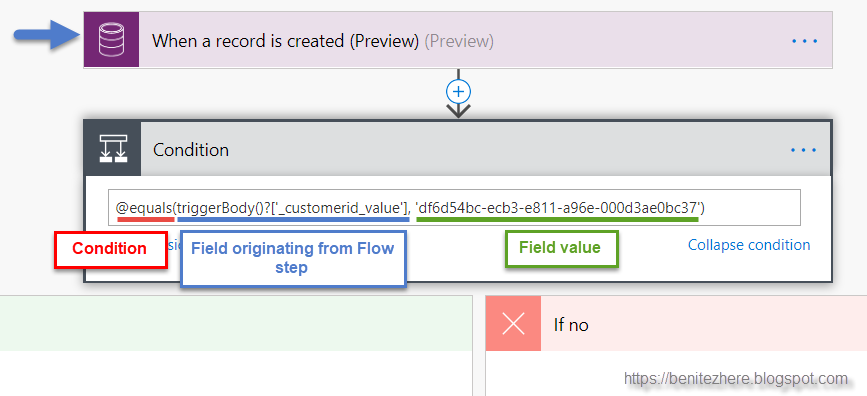
When we review the funky looking string in Advanced mode, this is how I see it:


Hopefully this makes sense to you.

How to do AND

You must use Advanced mode to be able to extend the function to have more than one criteria.

In my Flow condition, I was checking that the Customer equals Stark Industries and Product equals AI Support.

Again, here's my explanation of what the function is in Advanced mode.

How to do OR

Similar to AND but this time using OR instead.

How to group OR and AND statements

This one I figured out on my own. What I was able to work out is there's different parts to the function.

In Dynamics 365 workflows we are used to configuring it like the below,


We use "Group And" and "Group Or" clauses.

In Flow we apply the same logic in the following manner,

  1. In blue is the AND OR conditions
  2. In red is the two grouped OR conditions where the Product field value equals AI Support or Iron Man Armor.
  3. In green is the condition where customer equals Stark Industries

Bonus tips

Use GUID when referencing a lookup in a condition

In Dynamics 365 we are used to seeing the Name of the lookup value when referencing a related record in a condition.

In Flow we need to reference the GUID of a lookup value since it uses the odata APIs of Dynamics 365. In Unified Interface, it's easy to get the GUID in the URL.

Lookup record exists in target instance

If you export and import a Dynamics 365 workflow from a source instance into a target instance that references a related record through a lookup in a condition step, the workflow will not execute as expected if the record does not exist in the target instance.

Same principle applies in Flow so make sure the record does exist in the target instance. Otherwise when the Flow is imported into the target instance and the GUID does not exist, you're going to run into a problem.

Use Notepad++

Notepad++ is your best friend when it comes to making sure that you are not missing any close brackets which is what I demonstrated in my vlog. Notepad++ will highlight your brackets in red and it makes it easy to see where you are missing a close bracket.

Summary

To perform multiple conditions to use AND OR statements, and Group, you need to edit in Advanced mode to enter the correct function. It might appear as hard at first however you will get the hang of it. As mentioned earlier I am not a developer, but I was able to understand the concept of edit in Advanced mode when configuring the Flow condition step.

More #WTF coming. Stay tuned 😎
#FlowFever