Showing posts with label CDS. Show all posts

Thursday, 18 November 2021

How to extend the Document Automation Toolkit solution

Earlier this year I did a webinar with XRM Vision, a Microsoft partner based in Montreal, Canada. I showed how a Revenu Québec form can be automated using the Documentation Automation Toolkit. In the webinar I showed the Document Automation Toolkit in action including 

  • the prerequisites
  • how to install
  • configure the Document Automation Toolkit
  • build an AI Builder Form Processing model
  • end-to-end demo of automating the Revenu Québec form
You can watch the recording of this webinar here.

Towards the end of the webinar I mentioned that currently only 27 of the fields from the Revenu Québec form are included in the automation. Even though I built my AI Builder Form Processing model with 34 fields, only 27 fields were displayed in the Document Automation Application Canvas app. This is because only a maximum of 27 field have been defined in the Documentation Automation Toolkit. I said I'd be sharing soon how to extend the Document Automation Toolkit to include all fields. Well that time has come and this is what you'll learn in this #WTF episode 😊

Recap on the use case

I was automating the Revenu Québec Self-Employed Net Income form and the use story I came up with was the following,

As a Tax Advisor,

When an email is received and the attachment is the Revenu Québec Self-Employe Net Income form,

I want the data to be automatically extracted,

So that I don't have to enter it manually into our system

AND

I also need the ability to review the data extracted,

So that I can correct the data where relevant


Document Automation Toolkit components that need to be updated

To include the additional 7 fields (34 - 27 = 7), three components need to be updated in the Document Automation Toolkit solution.

1. Dataverse table

The Document Automation Data table needs to be updated so that it can reference the additional 7 fields. There are two sets of fields that need to be created. The first set of fields are for the Data values, the other set of fields are for the confidence score (displayed as a percentage) when the AI Builder Form Processing model extract the information based on the mapped fields defined in the model.

2. Cloud flow

The Document Automation Processor cloud flow needs to be updated so that the new fields in the Document Automation Data table are updated. This is so that
  1. The value extracted from the 7 fields are stored in Dataverse
  2. The values are displayed on the Canvas app

3. Canvas app

The Document Automation Application Canvas app needs to be updated so that two screens in the app display the 7 fields. 

The first screen is used by end users who will be configuring the Document Automation Toolkit including the app. In this screen the end user can see the mapped Revenu Québec fields and its values defined by in the AI Builder Form Processing model.


The second screen is used by end users who will be manually reviewing the data extracted by the AI Builder Form Processing model with the form uploaded.


Steps for extending the Document Automation Toolkit

Step 1 - Create a new solution and add the components

A new solution needs to be created so that the components can be configured. This is because the Document Automation Toolkit is a managed solution and if you make change directly in this managed solution, it will create an unmanaged layer.

In the new solution add the components from the Document Automation Toolkit solution. In my #WTF episode I added the following components.

Canvas app
Document Automation Application

Dataverse tables
Document Automation Configuration
Document Automation Data
Document Automation Processing
Document Table Data
Document Automation Table Taxonomy
Document Automation Taxonomy

Power Automate cloud flows
Document Automation Email Importer
Document Automation Processor
Document Automation Validator


Now when I think about it, I only needed to add the three components I outlined in the previous section rather than all of the components in the original Document Automation Toolkit solution 😂

Step 2 - Add columns to the Document Automation Data table

Depending on the number of fields in your form, the difference needs to be created in this table.
In my scenario I had a total of 34 fields I was automating. The difference between the 27 fields and the total of 34 fields is 7 fields. I needed to created 7 fields for the Data and 7 fields for the Accuracy Percentage.

I created columns Data28 to Data34. This is the value of the data extracted from the form as defined by the field mapping in the AI Builder Form Processing model.


I created columns Metadata28 to Metadata34. This is the confidence score from the AI Builder Form Processing model of the value extracted from the form.


Step 3 - Update the Document Automation Processor cloud flow

One of the core actions in this cloud flow stores the extracted data in the Document Automation Data table. With the columns added in Step 2, the respective fields in the action also need to be updated. Browse to the Document Automation Processor cloud flow and click Edit. Scroll down to the "Create document processing data" action and again, scroll down until you see the new columns added in Step 2.

In my scenario it's Data28 - Data34. Click on Data27 and copy its expression. Click on Data 28 and paste the expression into this field. Update the expression to reference Data28 column.

variables('DataDictionary')?['Data28']


Repeat for the remaining DataXX columns you created in Step 2.

Next, apply the same steps to the Medtadata columns created in Step 2. Click on Metadata27 and copy its expression. Click on Metadata28 and paste the expression into this field. Update the expression to reference Metadata 28 column.

variables('DataDictionary')?['Data28_confidence']


Repeat for the remaining MetadataXX columns you created in Step 2.

Step 4 - Update the Document Automation Application Canvas app

There are several controls that need to be updated in the Document Automation Application Canvas app.

Fields mapping screen

1. Expand the Fields mapping screen.

2. Select the Hidden Mapping Refresh Button. 

3. Select the OnSelect property as the formula needs to be updated.

4.Expand the formula bar and scroll down to the Patch function to update the JSON. 

5. Copy an existing row such as Data26.


6. Enter a new line, followed by pasting the content.

7. Update the Name, Index and remaining functions to reference 28.

            {
                Name: "Data28", Index: 28, 'Document Automation Configuration': CurrentConfiguration, 
                'Mapped Column': If(NbLabels >= 28, Last(FirstN(ModelKeysCollection, 28)).label)
            },

Repeat for the remaining DataXX columns you created in Step 2.


This will display the DataXX columns created in Step 2 in the screen for the end users who will be configuring the Document Automation Toolkit.


Document Detail Screen

1. Expand the Document Detail Screen.


2. Click the Document Header Form. If you scroll down, you'll see that there are DataCards for the 27 columns. New DataCards need to be added to the Document Header Form control to display the DataXX columns and MetadataXX columns created in Step 2.


3. Click on Edit fields. 

4. Click on Add field.

5. Search for Data28.

6. Select Data28.

7. Click Add.


A DataCard control will now be added to the Document Header Form. Scroll down to see it. 

8. Unlock the DataCard for Data28


9. Select all the controls within the DataCard and delete them. Yes, delete them - don't worry! Trust me!


10. Select one of the existing DataCards such as Data26_DataCard1.

11. Copy all of the three controls.


12. Select Data28_DataCard1 control and paste (hit CTL + P on your keyboard). The three controls will now appear. 


13. Update the name of the first control to reference 28 - DataCardConfidence28
14. Update the name of the second control to reference 28 - DataCardValue28 
15. Update the name of the third control to reference 28 - DataCardKey28


16. Select one of the existing DataCards such as Data26_DataCard1.
17. Select the DisplayName property.
18. Copy the formula.


19. Select Data28_DataCard1 control.
20. Select the DisplayName property.
21. Paste the formula.


22. Update the reference to 28.


23. Select the DataCardConfidence28 control.
24. Select the Text property.
25. Update the formula to reference Metadata28.


25. Rearrange the placement of the controls in the DataCard to to be in alignment to the other DataCards. Repeat for the remaining DataXX columns created in Step 2.

26. Save the Canvas app.
27. Publish the Canvas app.


That's it - that's how you extend the Document Automation Toolkit! Awesome sauce 😊

Document Automation Toolkit in action

Trigger the automation by sending an email to the Inbox email address configured in the cloud flow. 


As manual reviewer, load the Document Automation Application Canvas app and you'll now see the additional fields 🙂 

Summary

If you need to display all the fields that you've defined and mapped in your AI Builder Automation Form Processing model in the app that comes with Document Automation Toolkit solution, follow the steps above. By adding the columns beyond the 27 default fields, updating the cloud flow and the Canvas app extends the Document Automation Toolkit to suit your requirements.

Until next time #LetsAutomate

Friday, 23 July 2021

5 Tips & Trick with Power Automate Cloud Flows

On Tuesday July 13, 2021 I shared five tips and tricks with Power Automate Cloud Flows at my former Melbourne BusApps, D365 & Power Platform user group.

In this WTF episode I shared what these five tips and tricks are so that you can learn about them too in your own time 😊

1. Naming your connection references

When you use add an action and if it's the first action to be added for that connector, as the flow maker you are usually signed in automatically which is what is used as the connection for the connector. Your credentials is used for the authentication.

Below is an example where I have added a Microsoft Dataverse action from the Microsoft Dataverse connector and I am immediately signed in.


In the WTF episode I talked about how it will automatically use the name of the connector as the Default Name value for the connection reference. In this scenario, it will appear as Microsoft Dataverse.

Even if you create a new connection from within the action, the same behaviour will appear as demonstrated in the WTF episode where the newly created connection reference will appear as Microsoft Dataverse.

How to name your connection reference

Head over to your solution and add a new connection reference. In the side panel that appears 
  1. Enter your desired name in the Display name field
  2. Provide a description
  3. Choose a connector. In my scenario it is Microsoft Dataverse
  4. Choose your credentials as the Connection
  5. Click Create
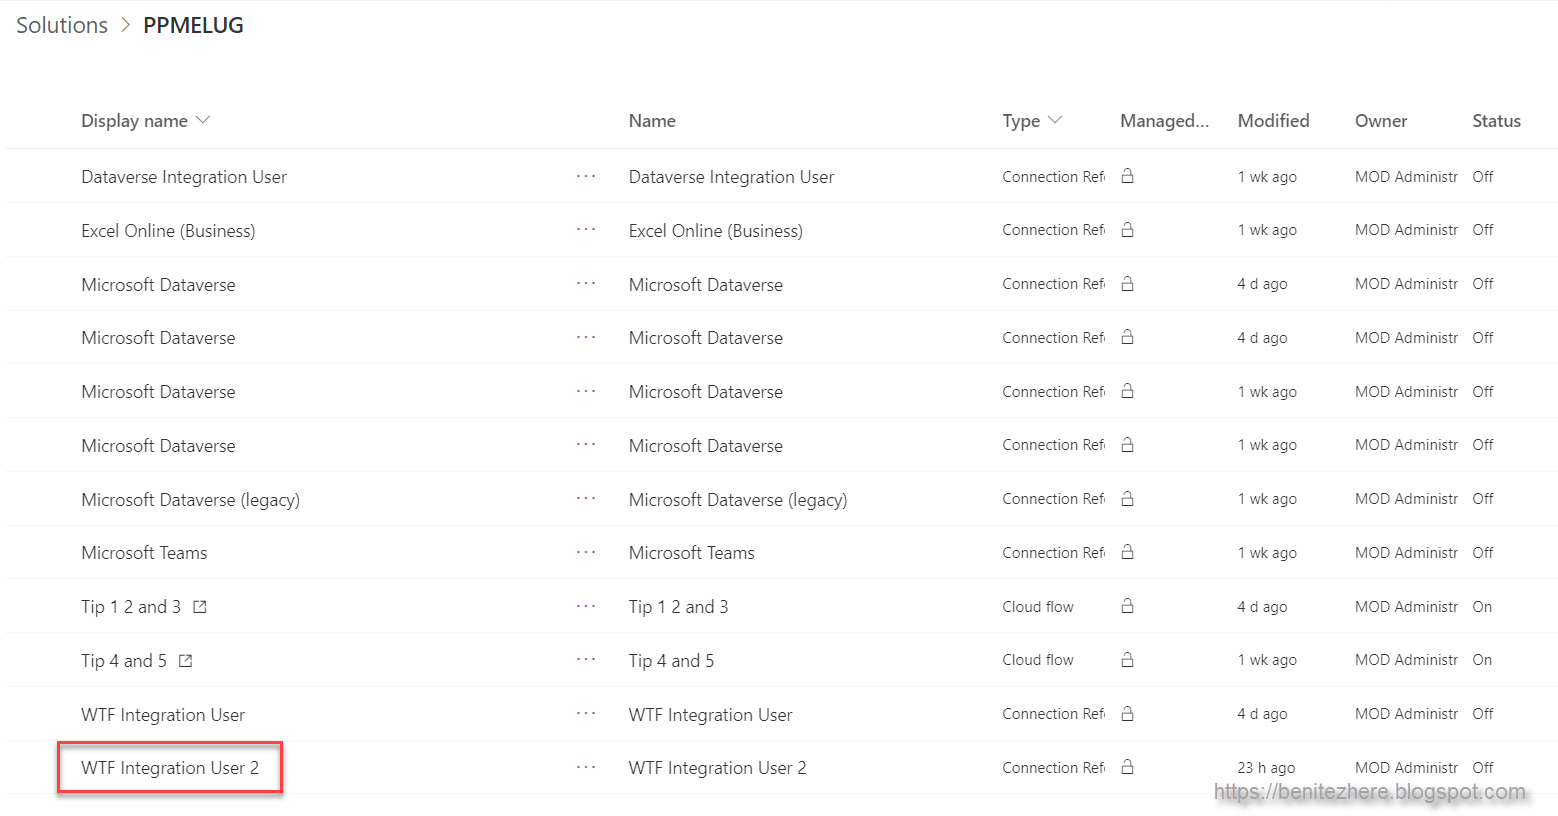
The newly created connection reference will appear in your solution.


When you view the connections in the action back in the cloud flow, you'll now see the named connection reference.

2. Create HTML table action #hack

If you try inserting a space in a header value when using the Create HTML table action, it won't work. In my scenario my header value I needed to enter was "Case Number" but when you hit the space bar on your keyboard, the space will not be rendered. The value will appear as "CaseNumber" instead.

How to insert a space in the header value

The hack I found was buried in a Power Automate community forum post. Open Notepad and type in your value, then copy and paste. That's it! Totally works.

3. Pieter's method for Apply to Each

There may be some use cases where you need to grab values from records or rows returned in an Apply to Each action to use them downstream in the cloud flow. The use case I mentioned in my WTF episode was about looping through the Cases to retrieve the fullname of the Owner so that it can be used in a notification for high priority cases.

Typically what has been done by flow makers (including myself in the past) is to 
  1. Have an Initialize Variable action before the Apply to Each which acts as the array variable
    1. In my WTF example I used this to form an array of the fullname values
  2. Within the Apply to Each have an Append to Array Variable action which grabs the fullnames of the Owner from each Case which is then surfaced up into the array variable (No.1)
  3. Any action downstream in the cloud flow can then use the array variable (No.1)

The infamous Pieter's method

Pieter's shared a blog post about what he discovered where variables are not used and that you can display your looped values as an array outside of the Apply to Each action. Couple of tricks here with a bonus tip.

Within the Apply to Each action, have a Compose action that will retrieve the value you're after. In my use case it was the fullname of the Owner associated to the high priority Case.


After this Compose action, add a new Compose action that references the output. Then, using the "Peek Code" feature, copy the expression.


Below the Apply to Each action or anywhere else downstream in the cloud flow, you can use the copied expression. I used a Compose action and copied the value to demonstrate that the fullname values were correctly retrieved


You'll notice however that it displays it as an array and will show duplicate values of the fullnames. This is because it grabbed all fullname values from all the Cases as expected. 


What if we only need to see the fullnames once, in other words the distinct values?

BONUS TIP TIME ✨

  1. To only display the distinct values, use the union function.
  2. To display the returned distinct values as a single string rather than an array, use the join function.
What's cool about the join function is that it is one smart cookie! 🍪 
The join function knows that after the last row in the array, it will not insert the delimiter you have defined in your expression. In my WTF episode use case, the expression was

join(union(variables('Fullnames'), variables('Fullnames')), ', ')


My defined delimiter is a comma and a space.

The cloud flow this time round will now display the array as string with distinct values only. No more duplicate fullname values 👍🏼 and also notice who there's no comma and a space after the last row/fullname. Told you the join function is one smart cookie 😁

4. Custom date and time formats

When you want to move away from the standard date and time formats, you can easily use a custom date and time format. This is useful when you want to have a particular format for uses cases that require a notification to be posted on Microsoft Teams in a channel or via email. 

Refer to the documentation for the format specifiers

The docs.microsoft.com documentation has been updated and outlines the different format specifiers.

For example the first format specifier, d, is displaying dates that have a day of 1 to 9 as a single integer value without a leading zero so it will appear as 1, 2, 3 and so forth.

The second format specifier in the document, dd, is displaying dates that have a day of 1 to 9 with a leading zero so it will appear as 01, 02, 03 and so forth.

In my use case in the WTF episode I wanted the date and time to display as the following

Sun Jul 18 03:00 PM

The format I used in my expression is the following

ddd MMM dd hh:mm tt

I also explained that I was using the convertFromUtc function in my expression as Microsoft Dataverse, like other systems, store date and time as UTC. If you use the value as-is from Microsoft Dataverse it will be in UTC. I therefore used the function to convert the UTC value into New Zealand local time. My expression is the following

convertFromUtc(triggerOutputs()?['body/createdon'], 'New Zealand Standard Time', 'ddd MMM dd hh:mm tt')

If you want to dynamically reference the timezone value because let's say you're in a country where there are multiple timezones, I got you! I covered this in previous WTF episodes
  • How to identify a Contacts' time zone in Flow using CDS and Bing Maps
    • This covers how to get a Contacts' time zone so that you can format the date to their local time. This is useful for external communications.
  • How to populate a date and time field based on a user's local time zone
    • This covers how to get the user's time zone so that you can format the date to their local time. This is useful for internal communications amongst the user's who have access to Microsoft Dataverse.
    • Note: This would only work if the communication is sent to a single person. In the scenario where it is sent to a group of users who may be in different timezones, then the suggestion here is to make a reference to the timezone such as "Sun Jul 18 03:00PM NZST"

5. Dataverse trigger condition

I covered this in my last WTF episode and this time round the use case is different to demonstrate how trigger conditions for the Microsoft Dataverse connector can be applied.

The example I gave in this WTF episode is about triggering the cloud flow only if the customer associated to the Case is an Account. The customer column is special where it can have two types - Account or Contact.

In the scenario where the customer column value is a Contact, the cloud flow should not trigger.

The trick

For every trigger in cloud flows, there will always be a response/output provided. The trigger in my cloud flow is the "When a row is added, modified or deleted." In the run history of a cloud flow that succeeded, you can review the outputs.


If you scroll down you'll see a property of 

_customerid_type

Copy this property and in the edit mode of the cloud flow, 
  1. Click on the ellipsis (. . .)
  2. Navigate to Settings
  3. Enter an expression in the Trigger Conditions

The expression I used is

@equals(triggerBody()?['_customerid_type'], 'accounts')

This expression references the property and therefore the condition is that the property of  must equal accounts.

The cloud flow will now only trigger when the customer associated to the Case is an Account, and not a Contact.

If you want to learn how to do AND OR statements in your condition refer to my second WTF episode #2018Throwback 

What I shared in WTF Episode 2 is in reference to the deprecated Condition action which is no longer available but the same principles apply to the trigger conditions in the Settings of the trigger for the Cloud Flow.

Summary

These were the 5 tips and tricks I shared in the user group session. 
  1. Create the connection reference in a solution in order to enter a named connection reference
  2. Use Notepad and copy + paste your value for the Header into your Create HTML table action to have a space in the Header value
  3. Outside of the Apply to each action reference the output of the Compose action within the Apply to each action and use a couple of functions to display the array as a string
    1. Union - to retrieve only the distinct values in the array
    2. Join - to display the distinct values from the array as a single string
  4. Refer to the Power Automate Cloud Flow documentation to format the desired custom date and time value
  5. Use the Microsoft Dataverse trigger conditions under Settings to enter an expression that references the properties in the body of the trigger
Awesome sauce. I hope you learnt something new and thanks for stopping by 😄

Thursday, 25 February 2021

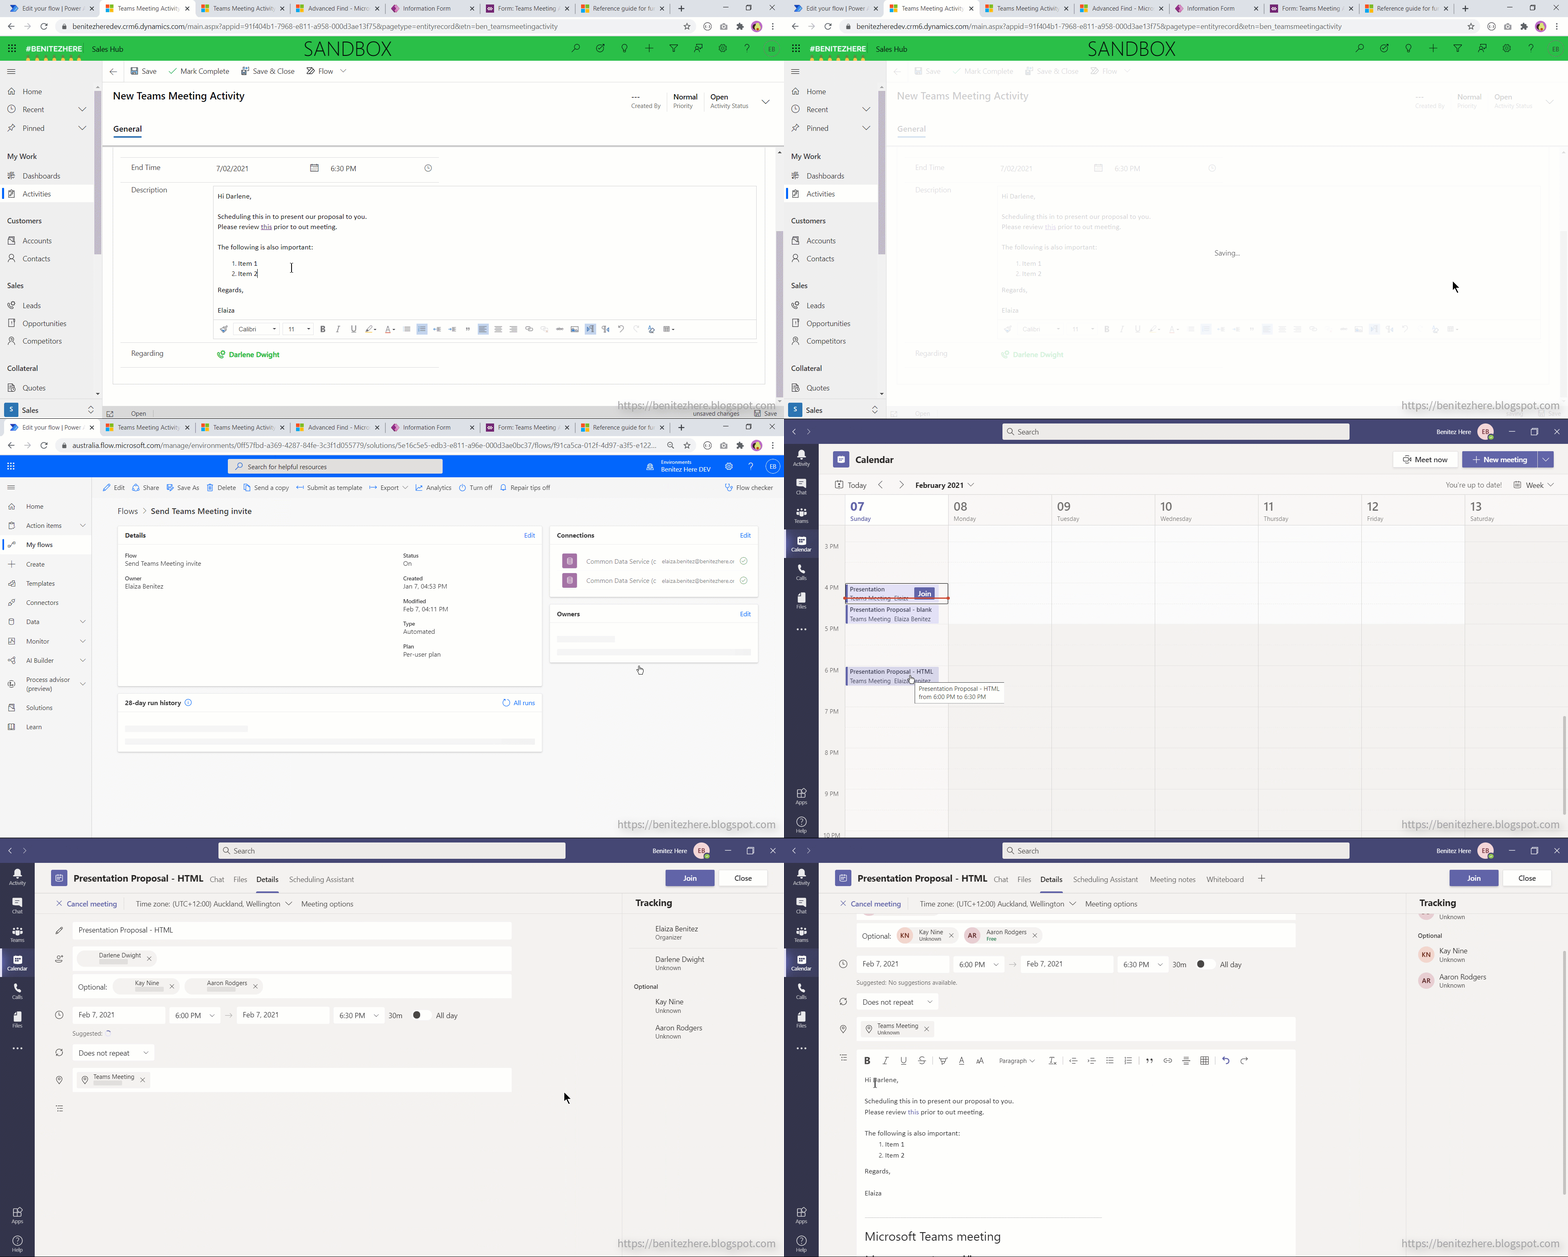
How to apply HTML to a Teams Meeting from Microsoft Dataverse or Dynamics 365

In my previous WTF episode I outlined how you can display line breaks in a Teams Meeting invite created from Microsoft Dataverse and Dynamics 365. What I mentioned towards the end was that in the next WTF episode I'd share how to apply HTML to the Teams Meeting.

Let's Automate

This is what my cloud flow looks like in Power Automate


This should look similar to my original WTF episode where the difference here is using a different function in the expression.

Expression for the Content property

In the final HTTP action the expression is updated to the following
coalesce(triggerOutputs()?['body/description'], '')


As mentioned in my previous WTF episode, when the Description column is null you want to be able to account for this otherwise the cloud flow will fail. The Coalesce function helps by ensuring that it will treat any null values as null, whereas non-null values are defined by the reference in the Coalesce function. In this scenario it will be the value in the Description column.

Enabling the Rich Text Editor Control for the multiline text column

If you didn't already know, Microsoft Dataverse and Dynamics 365 have controls that can be enabled for columns.
The Rich Text Editor control is what we want to enable for the Description column.

Steps

In the make.powerapps.com site, navigate to the form and click on the Switch to classic button.


Select the multiline text column (in my case it is Description) and click on Change Properties.


Click Add Control.


Select Rich Text Editor Control and click Add.


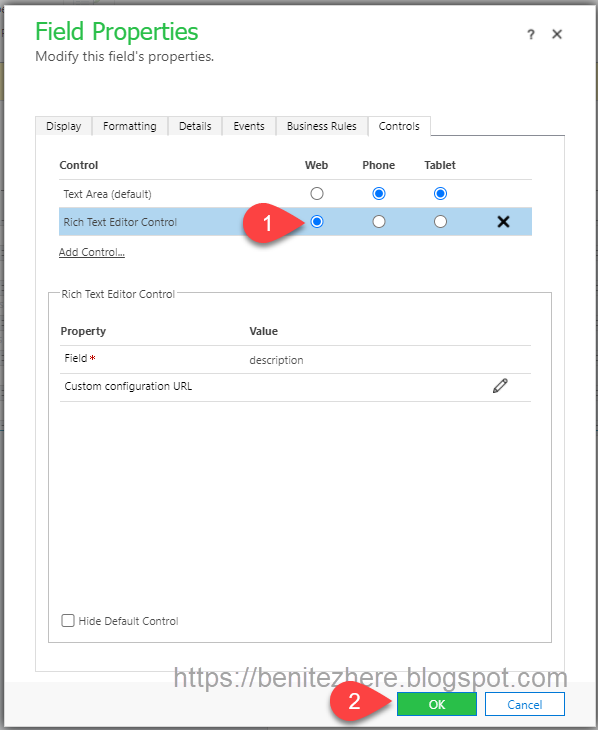
Select the Web radio button for the Rich Text Editor Control and click OK.


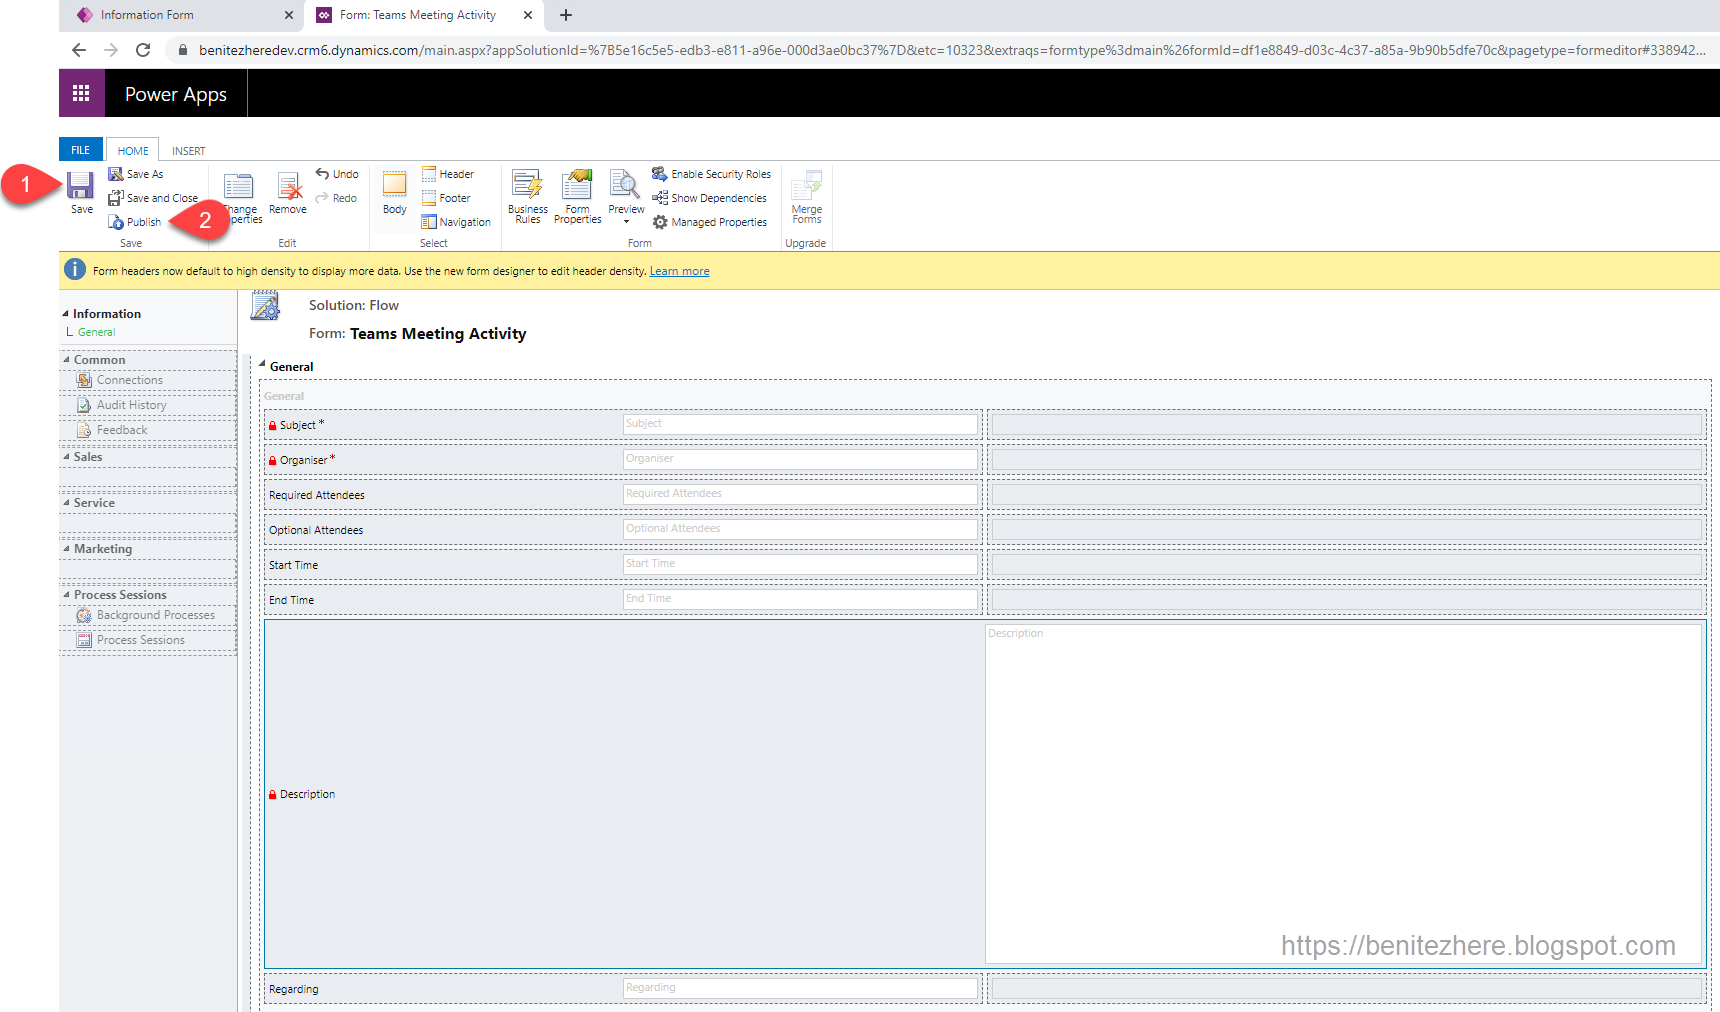
Click Save and Publish.


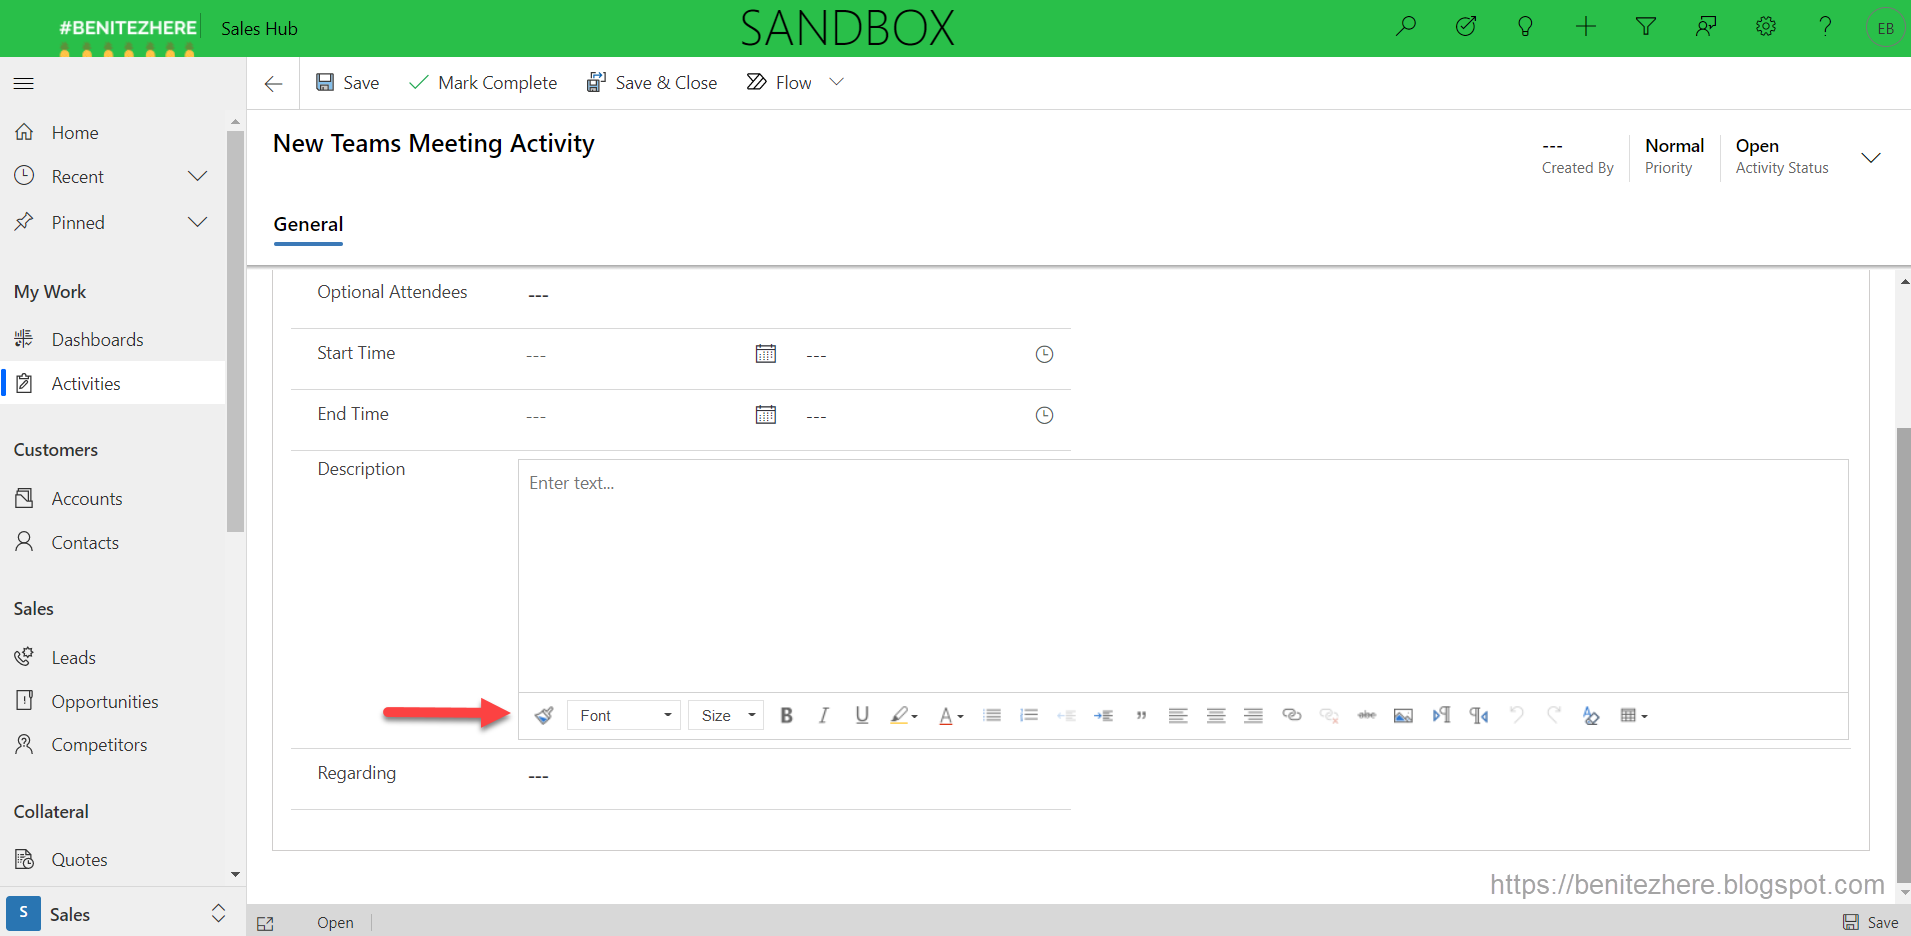
Refresh your browser and create a new Teams Meeting activity record in Microsoft Dataverse or Dynamics 365. The Rich Text Editor (also known as WYSIWYG editor) will be displayed where end users can start applying formatting.


Cloud flow in action

Create a new Teams Meeting Activity in Microsoft Dataverse or Dynamics 365 and let the magic flow ✨

When there is a description provided, the Teams Meeting will render the value in the multiline text column as HTML.


When there is no description provided, the Teams Meeting will display the content as blank. The cloud flow will not fail.

Summary

By enabling the Rich Text Editor control for the multiline text column and referencing the column in an expressions will render the formatting from Microsoft Dataverse or Dynamics 365 as HTML in the Teams Meeting. The Coalese function was used to ensure the cloud flow does not fail when no details is entered in the multiline text column.

Thanks

Would like to say thank you to all my #WTF followers to date. I reached my 2000 subscribe milestone on YouTube recently 🎉