In
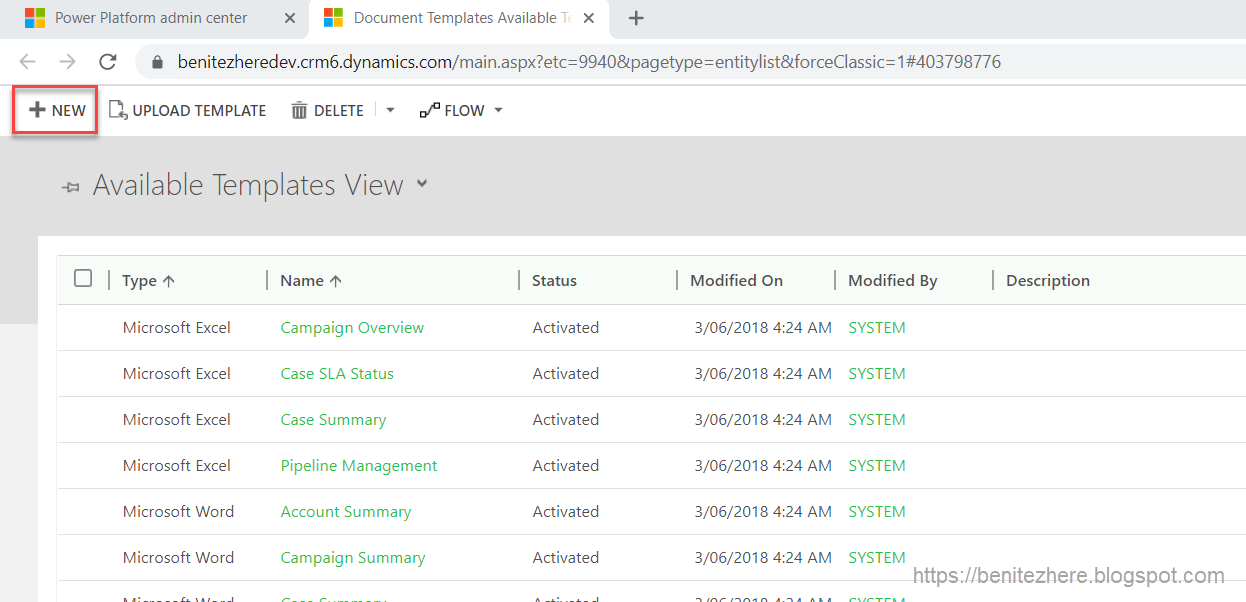
Part 1: How to create a Word template in Dynamics 365
of my PDF automation series I covered how to create a Word Template in Dynamics
365 as a Document Template record is referenced in the API request that will
generate the PDF based on the entity defined in the Word Template.
In this episode, Part 2 will cover how to create a custom connector for Dynamics 365 in Power Automate. In the custom connector two actions will be created where there will be


Before moving on to creating the custom actions in the Definition step of the custom connector, click Update connector. Always click this whenever you apply any configuration.




I worked out the JSON Payload request from this blog post where the following properties are

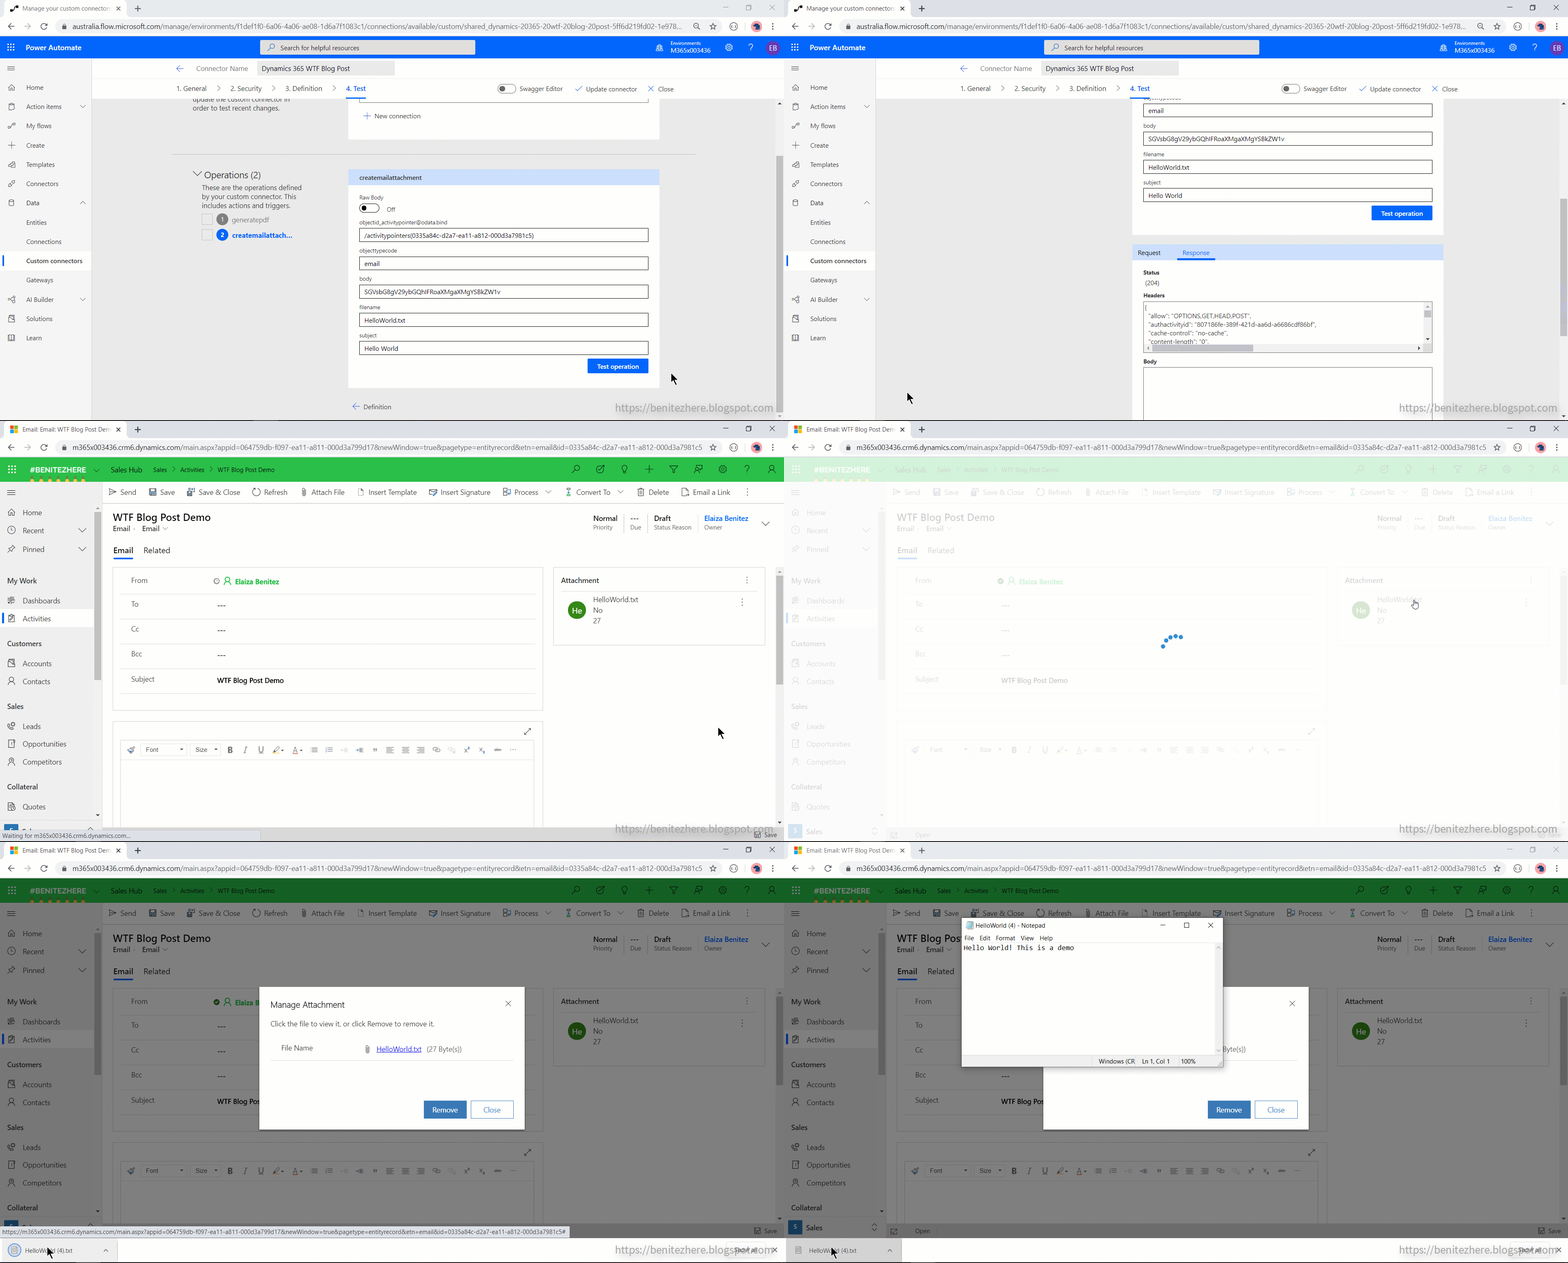
Once all the property values have been entered, click test operation. The status response should be 204 and you'll see the JSON returned. Open the email activity record in the Dynamics 365 Sales Hub to double check the file was created and attached to the email activity record 👍

In this episode, Part 2 will cover how to create a custom connector for Dynamics 365 in Power Automate. In the custom connector two actions will be created where there will be
- An action that calls the ExportPdfDocument Dynamics 365 API request - this will generate a PDF based on a Document Template record that has a defined Word Template
- An action that calls the activitymimeattachments Dynamics 365 API request - this will attach the PDF file generated from the previous action to an email activity record
Prior to creating a custom connector, a prerequisite task is to create an
App Registration in Azure Portal which I will cover.
**I'd like to make it clear that as of today, Convert to PDF is configured
and supported in the Dynamics 365 Sales Hub app**
Use Case
Before we jump into the How To's, a reminder that the use case for this
series will be
As a customer,
As a customer,
I want to receive a Tax Receipt of my purchase in an email,
so that I have confirmation of my purchase.
The life cycle of the process will be
- A Dynamics 365 Invoice record is updated to paid.
- My flow in Power Automate is triggered that handles all the magic.
- The customer associated to the Invoice will receive an email with a PDF attached that represents their Tax Receipt.
Why is a custom connector needed?
This PDF Automation series stemmed from my curiosity of whether we can
automate the Convert to PDF functionality. As mentioned in my vlog, as of
today the Convert to PDF is what we refer to as "on-demand" where it requires
an end user to select a Document Template before creating or emailing the
converted Word Template associated to the Document Template record as a
PDF.
Stefan Strube another Microsoft MVP in our community published this blog post where he shared how to automatically generate a PDF which is fundamental to my PDF Automation series. Thanks Stefan and hello! 😄 The action used in Stefan's blog post is the Invoke an HTTPs request which works.
If there is a use case for an end user to trigger the automation on selection of a record the following experience will appear where they are prompted to provide the configuration information for the Invoke an HTTPs request action. Chances are the end user may not know this information and it's not a smooth end user experience. The workaround is to use a custom connector that has the authentication configured to prevent the end user from having to enter in details regarding the Dynamics 365 instance for the Sales Hub app.
Stefan Strube another Microsoft MVP in our community published this blog post where he shared how to automatically generate a PDF which is fundamental to my PDF Automation series. Thanks Stefan and hello! 😄 The action used in Stefan's blog post is the Invoke an HTTPs request which works.
If there is a use case for an end user to trigger the automation on selection of a record the following experience will appear where they are prompted to provide the configuration information for the Invoke an HTTPs request action. Chances are the end user may not know this information and it's not a smooth end user experience. The workaround is to use a custom connector that has the authentication configured to prevent the end user from having to enter in details regarding the Dynamics 365 instance for the Sales Hub app.
How to create an App Registration in Azure Portal for your Dynamics 365 instance
An App Registration is required to allow the custom connector to use Azure AD
as a way of authentication to the Dynamics 365 instance. Whenever connectors
are used in flows within Power Automate, a connection using credentials to the
service is needed. For example when using a SharePoint action you have the
ability to select a connection. Same concept applies to a custom connector. A
couple of material you can read,
- This docs.microsoft.com article clearly explains the steps required to create an App Registration in Azure portal.
- This docs.microsoft.com article provides some further explanation on what is an App Registration.
The following are the steps that I showed in my WTF vlog.
Log into Azure portal and search for App Registration.
Click on +New Registration.
Enter a Name and select whether you want a single tenant or multiple tenant
followed by the register button. We'll come back to the Redirect URI
configuration after the customer connector has been created.
There will be a message that indicates the App Registration is being
created.
Once created you'll see details of the App Registration which will be
referenced when the custom connector for Dynamics 365 is created.
A couple of things need to be configured afterwards. The first one I showed in
my vlog was to enable
API permissions
for Dynamics 365. The custom connector will access with the Dynamics 365 API
using the connection configured for the selected custom action (this will make
sense in Part 3 of my PDF Automation series). Head over to API permissions and
click on +Add a permission and select the Dynamics CRM option.
Tick the checkbox for the permission that is displayed and click Add
permissions.
A message will appear that confirms the permissions has been added and it will
be listed.
The other configuration is to create a Client Secret which will be for the
security of the custom connector for Dynamics 365. Head to Certificates &
secrets, click +New client secret and provide a name for the Client Secret.
Select the option Never for the expiry setting and then click add.
The Client Secret will be created. Copy the Client Secret value and
save it some where as this will be used for the
security of the custom connector for Dynamics 365.
How to create a custom connector for Dynamics 365 in Power Automate
Once the App Registration for Dynamics 365 has been created a custom connector
can be created in Power Automate. Head to the Power Automate maker site and
select Custom connectors. Click on +New custom connector and select the option
to Create from blank.
Name the custom connector and click continue.
An icon can be selected to identify the custom connector. In my vlog I was
using a Pineapple icon from
icons8. A
background colour can also be defined. For the Scheme value, leave it as
HTTPS.
The Host value will be the organisation part of the Dynamics 365 instance URL.
Click Create connector to create the custom connector before moving on to the
Security configuration step.
How to configure the security for the custom connector
Next security for the custom connector needs to be configured. Click Edit and then select the option of OAuth 2.0.
For the Client ID and Client Secret values, copy and paste from the App
Registration in Azure Portal. You would have saved your Client Secret some
where from the earlier step. Copy and paste the full organisation URL of the
Dynamics 365 instance including the HTTPS for the Resource URL value
Remember that Redirect URI configuration field in the App Registration when
the App Registration was created? The Redirect URI configuration field in the
App Registration needs to be updated with the Redirect URL generated in the
Security configurations of the custom connector for Dynamics 365.
Before moving on to creating the custom actions in the Definition step of the custom connector, click Update connector. Always click this whenever you apply any configuration.
How to create Actions for the custom connector
When we use connectors available today in flow within Power Automate, we have
the ability to select either a trigger or an action for the connector.
Now that the custom connector has been created, the next step is to create
actions which involve providing the API request and JSON Payload of that API
request.
1. Creating an action that will generate a PDF
As seen in
Stefan Strube's blog post, the Dynamics 365 API request to call that is used by the Dynamics 365 Sales
Hub app is the ExportPdfDocument using the POST method. I am using the same
JSON payload that Stefan shared but with one adjustment where I am excluding
the following highlighted in Red. When I was putting this all together earlier
this year I found that it would fail if I included these character references.
{
       "EntityTypeCode": 1084,
       "SelectedTemplate": {
              "@odata.type": "Microsoft.Dynamics.CRM.documenttemplate",
              "documenttemplateid": "153dc496-d79d-e711-8109-e0071b65ce81"
       },
       "SelectedRecords": "[\"{E3A79DA1-9B91-E811-8133-E0071B65CE81}\"]"
}
To create a new action
- Click on +New action.
- Enter a name.
- Enter a value for the Operation ID, I use the same value as the name but all in lowercase.
- Click on +Import from sample to create the API request.
- Select the method of the API request. In my use case it is POST.
- Provide the URL of the API request. In my use case it is
- https://ORG.crm6.dynamics.com/api/data/v9.1/ExportPdfDocument
- Provide the JSON Payload.
- Click Import.
- Click Update Connector.
My JSON Payload is the following
{
    "EntityTypeCode": 1090,
    "SelectedTemplate": {
      "@odata.type": "Microsoft.Dynamics.CRM.documenttemplate",
      "documenttemplateid": "d2b253f9-5433-ea11-a813-000d3a795c19"
    },
    "SelectedRecords": "4c339def-0c43-ea11-a812-000d3a795c19"
}
- The EntityTypeCode represents the entity that the PDF will be generated against. In my use case it is the Invoice entity.
- The SelectedTemplate block represents the Document Template record with the Word Template that the API request will use to generate the PDF. This will be the Document Template record from Part 1: How to create a Word template in Dynamics 365.
- The SelectedRecords property represents the Invoice record the PDF will be generated against.
To retrieve the EntityTypeCode value of the record for the JSON Payload you
can call the EntityDefinition API Request with some filters to obtain the
value.
https://ORG.crm6.dynamics.com/api/data/v9.1/EntityDefinitions?$select=LogicalName,ObjectTypeCode&$filter=LogicalName eq 'invoice'
Once the connector has been updated you'll see that your action has been
created.
One of the things I love about the custom connector in Power Automate is the
ability to test the API request directly within the custom connector
configuration. Click on Test and create a new connection to authenticate with
the request using your credentials.
Here comes the fun part, the testing! Enter in the property values for the
JSON payload. A reminder from earlier what the properties represent,

- The EntityTypeCode represents the entity that the PDF will be generated against. In my use case it is the Invoice entity where the value is 1090.
- The SelectedTemplate block represents the Document Template record with the Word Template that the API request will use to generate the PDF. This will be the Document Template record from Part 1: How to create a Word template in Dynamics 365.
- The SelectedRecords property represents the Invoice record the PDF will be generated against.
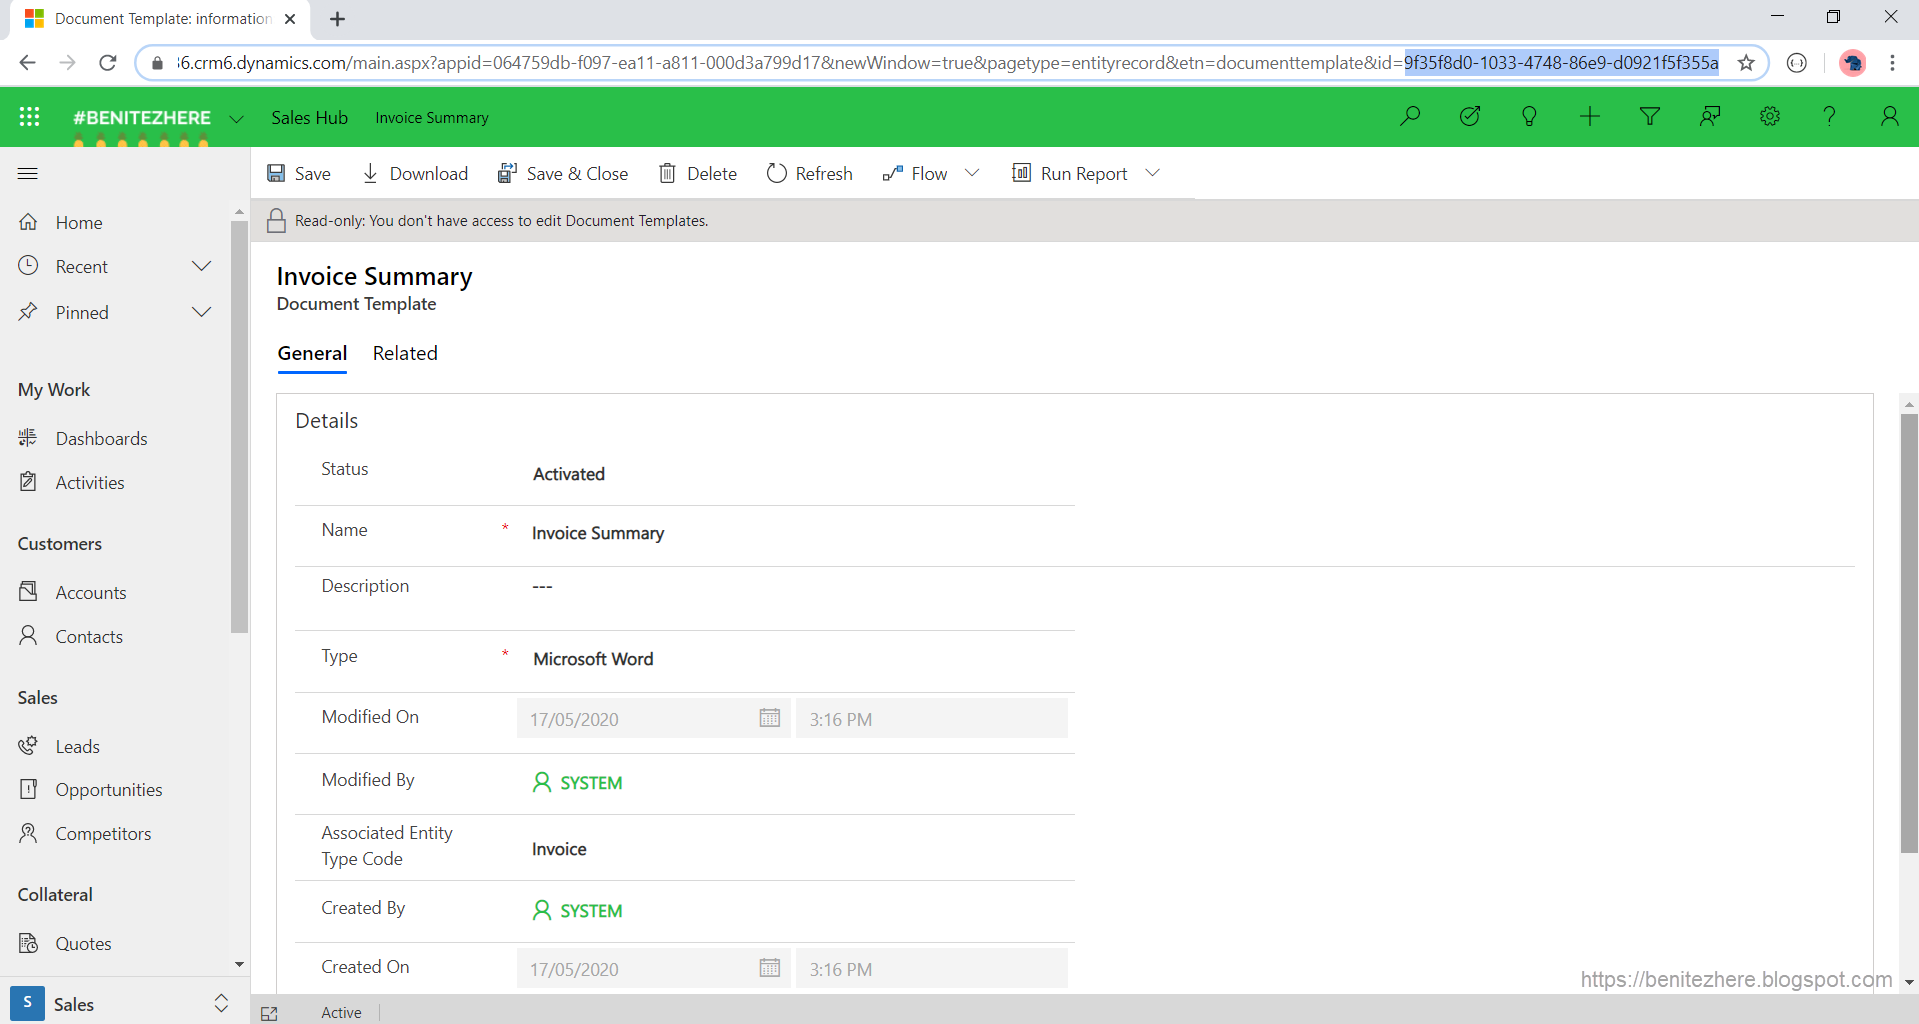
To retrieve the Document Template ID value, open the Document Template
record of the Word Template to be referenced. Copy the GUID at the end of
the record URL.
To retrieve the Invoice ID value of an Invoice record to be referenced, open
an existing Invoice record. Copy the GUID at the end of the record URL.
If you test the operation right now it will fail. Remember how we didn't
include the extra characters when creating the Request of the action? We need
to include some of those characters in the SelectedRecords field. The
characters to include is the following highlighted in yellow.
[{"21ce9319-22a3-ea11-a812-000d3a7981c5"}]
[ ] Means make it an array, " " means make it a string, so this is saying make
it an array of strings. I interpreted this as the API request likely needs an
array of all the GUIDs that you want to generate a PDF for.
Once the SelectedRecords property value has been updated, it's ready to test!
The status response should be 200 and you'll see the JSON returned where there
is a PdfFile property with a base64 value that represents the encoded PDF file
that was generated.
2. Creating an action that will create the PDF as an activitymimeattachment record
Activitymimeattachment is the entity record which will contain information of
the attachment such as the encoded base64 value.
This forum post
explains it well.
The reason why we are using an API request to create the
activitymimeattachment record is because today if we attempt to use the Create
action from the CDS current environment connector and select the second
attachments option when searching for the entity (from memory) the following
error will be thrown,
The 'Create' method does not support entities of type 'attachment'.If you then try the other attachments option you'll still come across a problem as the Item ID is required which can't really be provided since the attachment record has not been created. Therefore I thought of calling the activitymimeattachments API request instead as I learnt from this forum post that the activitymimeattachment should be created first where Dynamics 365 will then create the corresponding attachment record.
Side note: Linn Zaw Win did write a
blog post
that shows you how to send an email which uses a combination of the CDS
standard connector and CDS CE standard connector.
Same steps as before, create a new action, provide a name and operation id
value and lastly the JSON payload request. Make sure you click Update
connector once the Request has been created.
I worked out the JSON Payload request from this blog post where the following properties are
- objectid_activitypointer@odata.bind
- The email activity record to bind the activitymimeattachment
- objecttypecode
- The value is email since the activitymimeattachment will be associated to an email activity record
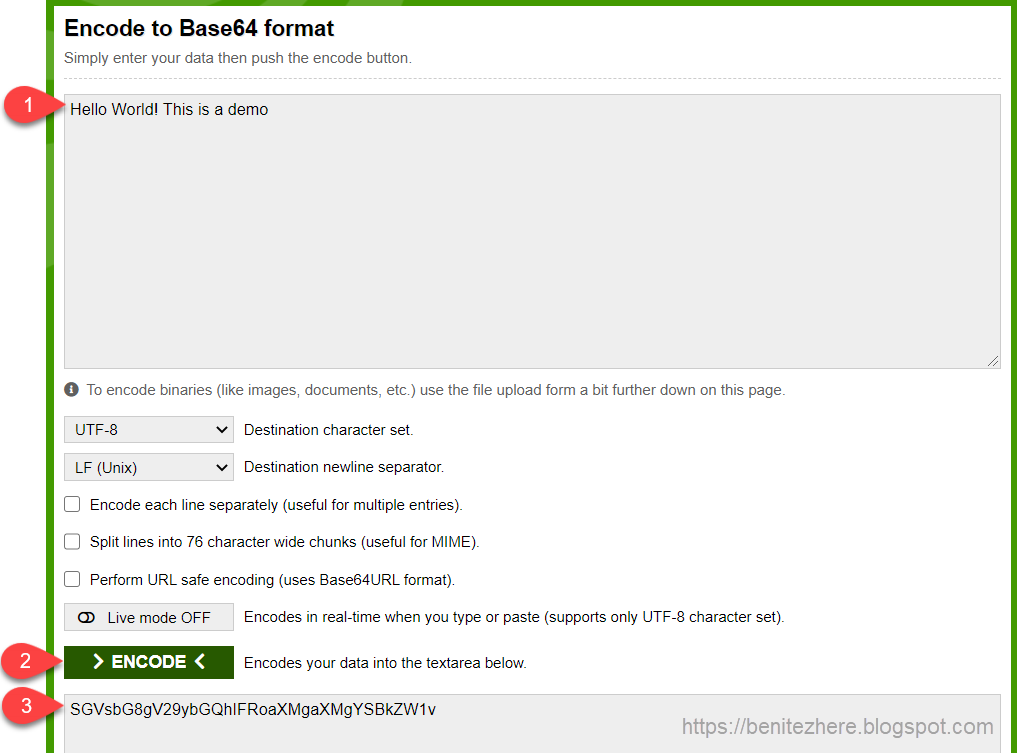
- body
- This is the encoded base64 value of what would be the generated PDF. In my WTF vlog I was using this site to generate an encoded sample of "Hello World. This is a demo"
- filename
- This is the file name. It is important in this step to include a reference to the file type. In my WTF vlog I was using a .txt
- subject
- This is a descriptive subject for the attachment. In my WTF vlog I used "Hello World" as an example
The next part is testing it out again. To bind the activitymimeattachment
to an email open an existing record and copy the GUID from the email
record URL.
For the encoded base64 value I used
this site to
generate a sample value.
Once all the property values have been entered, click test operation. The status response should be 204 and you'll see the JSON returned. Open the email activity record in the Dynamics 365 Sales Hub to double check the file was created and attached to the email activity record 👍
Check the custom connector is visible when creating a new flow in Power Automate
Now that we've learnt how to do an App Registration and create a custom
connector with actions for Dynamics 365 we can now check it out in flow!
Head to the Power Automate maker site and create a new flow. Once the
trigger has been defined add a new action and click on the Custom tab. The
two actions created will be displayed and can be selected to add to the
flow. Awesome sauce 🙌😄💙
Summary
It's pretty cool that we can create a custom connector for Dynamics 365 if the actions available in the CDS current environment connector will not suffice what needs to be achieved. The beauty of Dynamics 365 and CDS is that the APIs have existed for years and with flow in Power Automate it's now even more easier to perform API requests as the authentication can be configured directly in Power Automate. For PDF automation all it requires is- An App Registration through Azure Portal for the Dynamics 365 instance of the Sales Hub App
- Create a custom connector using the App Registration details with custom actions using the Dynamics 365/CDS APIs
Once this is all fine tuned, the custom connector will be available to use
in the environment for you to continue making flows in Power Automate.
Thanks for reading this detailed blog post of Part 2 of my automation series. Part 3 will cover all of this in action using actions I've covered in previous WTF episodes.
Thanks for reading this detailed blog post of Part 2 of my automation series. Part 3 will cover all of this in action using actions I've covered in previous WTF episodes.
Your Vote Counts!
If you want Convert to PDF across custom entities then vote for
this Dynamics 365 Idea
to gain momentum. I would love to see this functionality across the Dynamics
365 platform so let's do our part by voting for it.
Where my Starship Troopers fans at?! 😁